How to create a contact group and send a group text
Create a contact group, add people one at a time or import a CSV, then send everyone a personalised text from the Send SMS page.
A contact group is a saved list of people, such as patients, staff or members, that you can text in one go. Create the group, add contacts by hand or from a spreadsheet, then pick the group on the Send SMS page. You can personalise each message with the person’s name.
1. Create a group
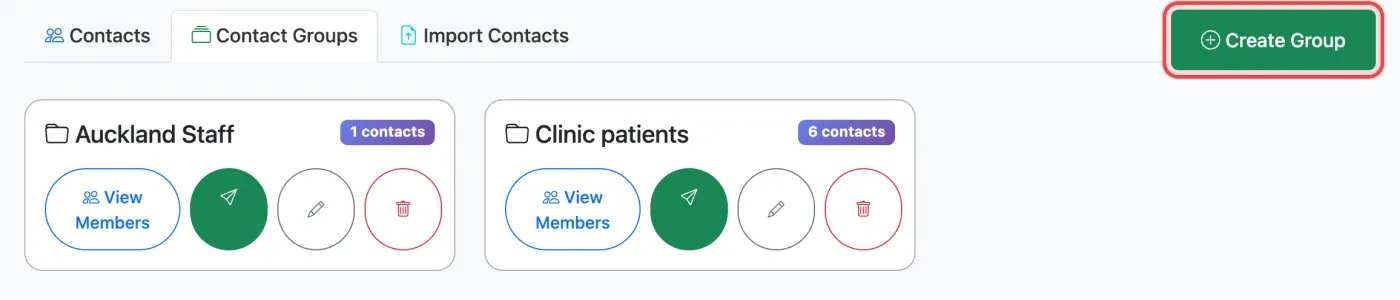
- Open your groups. Click Contacts in the top menu, then the Contact Groups tab.
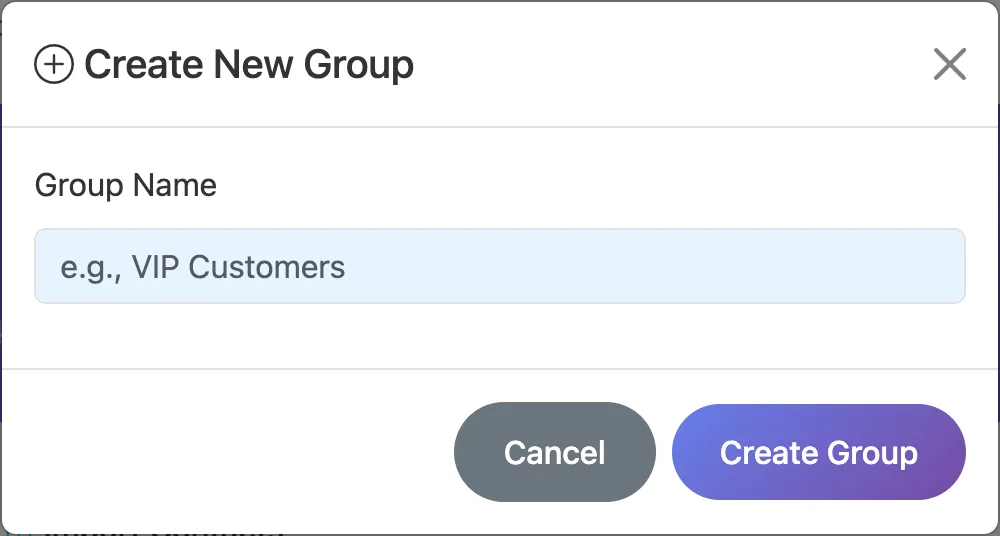
- Click Create Group. Give it a name you’ll recognise, e.g.
Clinic patientsorWeekend roster, and click Create Group.
2. Add contacts to the group
Every contact belongs to a group. The same number can be in more than one group.
One at a time
On the Contact Groups tab, click View Members on your group, then Add Members. Enter a phone number and, optionally, the person’s name, or search for someone already in another group and add them. You can also use Contacts → Add Contact and choose the group there.
Import a spreadsheet (CSV)
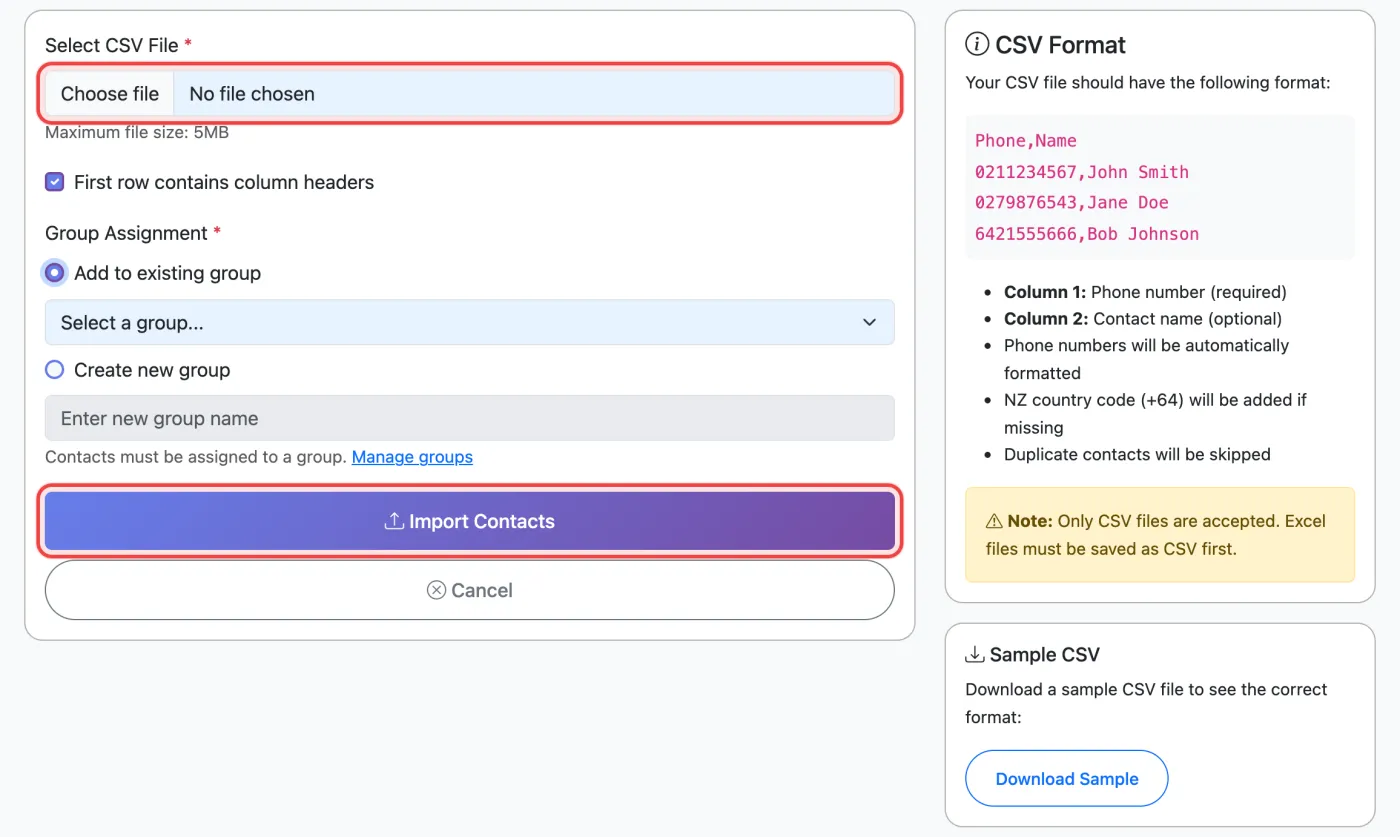
- Prepare your file. Save it as a CSV, not an Excel file. Put the phone number in one column and the name in another. A header row such as
Phone,Nameis fine, and the columns can be in either order. - Open Import Contacts. Go to Contacts → Import Contacts and choose your file.
- Choose the group. Pick Add to existing group, or Create new group and type a name.
- Click Import Contacts. A progress window shows how many were imported and lists any rows that were skipped and why.
- Number formats:
021 123 4567,021-123-4567,6421234567and+6421234567all work. Spaces and dashes are removed, and NZ numbers get the64country code added automatically. - Duplicates: a number already in that group is skipped, so it’s safe to re-import an updated list.
- Names: put the full name in a single column, e.g.
Sam Taylor. That’s what personalisation uses. - Need a template? Click Download Sample on the import page.
Importing doesn’t check opt-outs. If someone on your list previously replied STOP, they’ll be added back to the group but still won’t receive messages. Clean them out afterwards. See how to find and remove opted-out numbers.
3. Send a message to the group
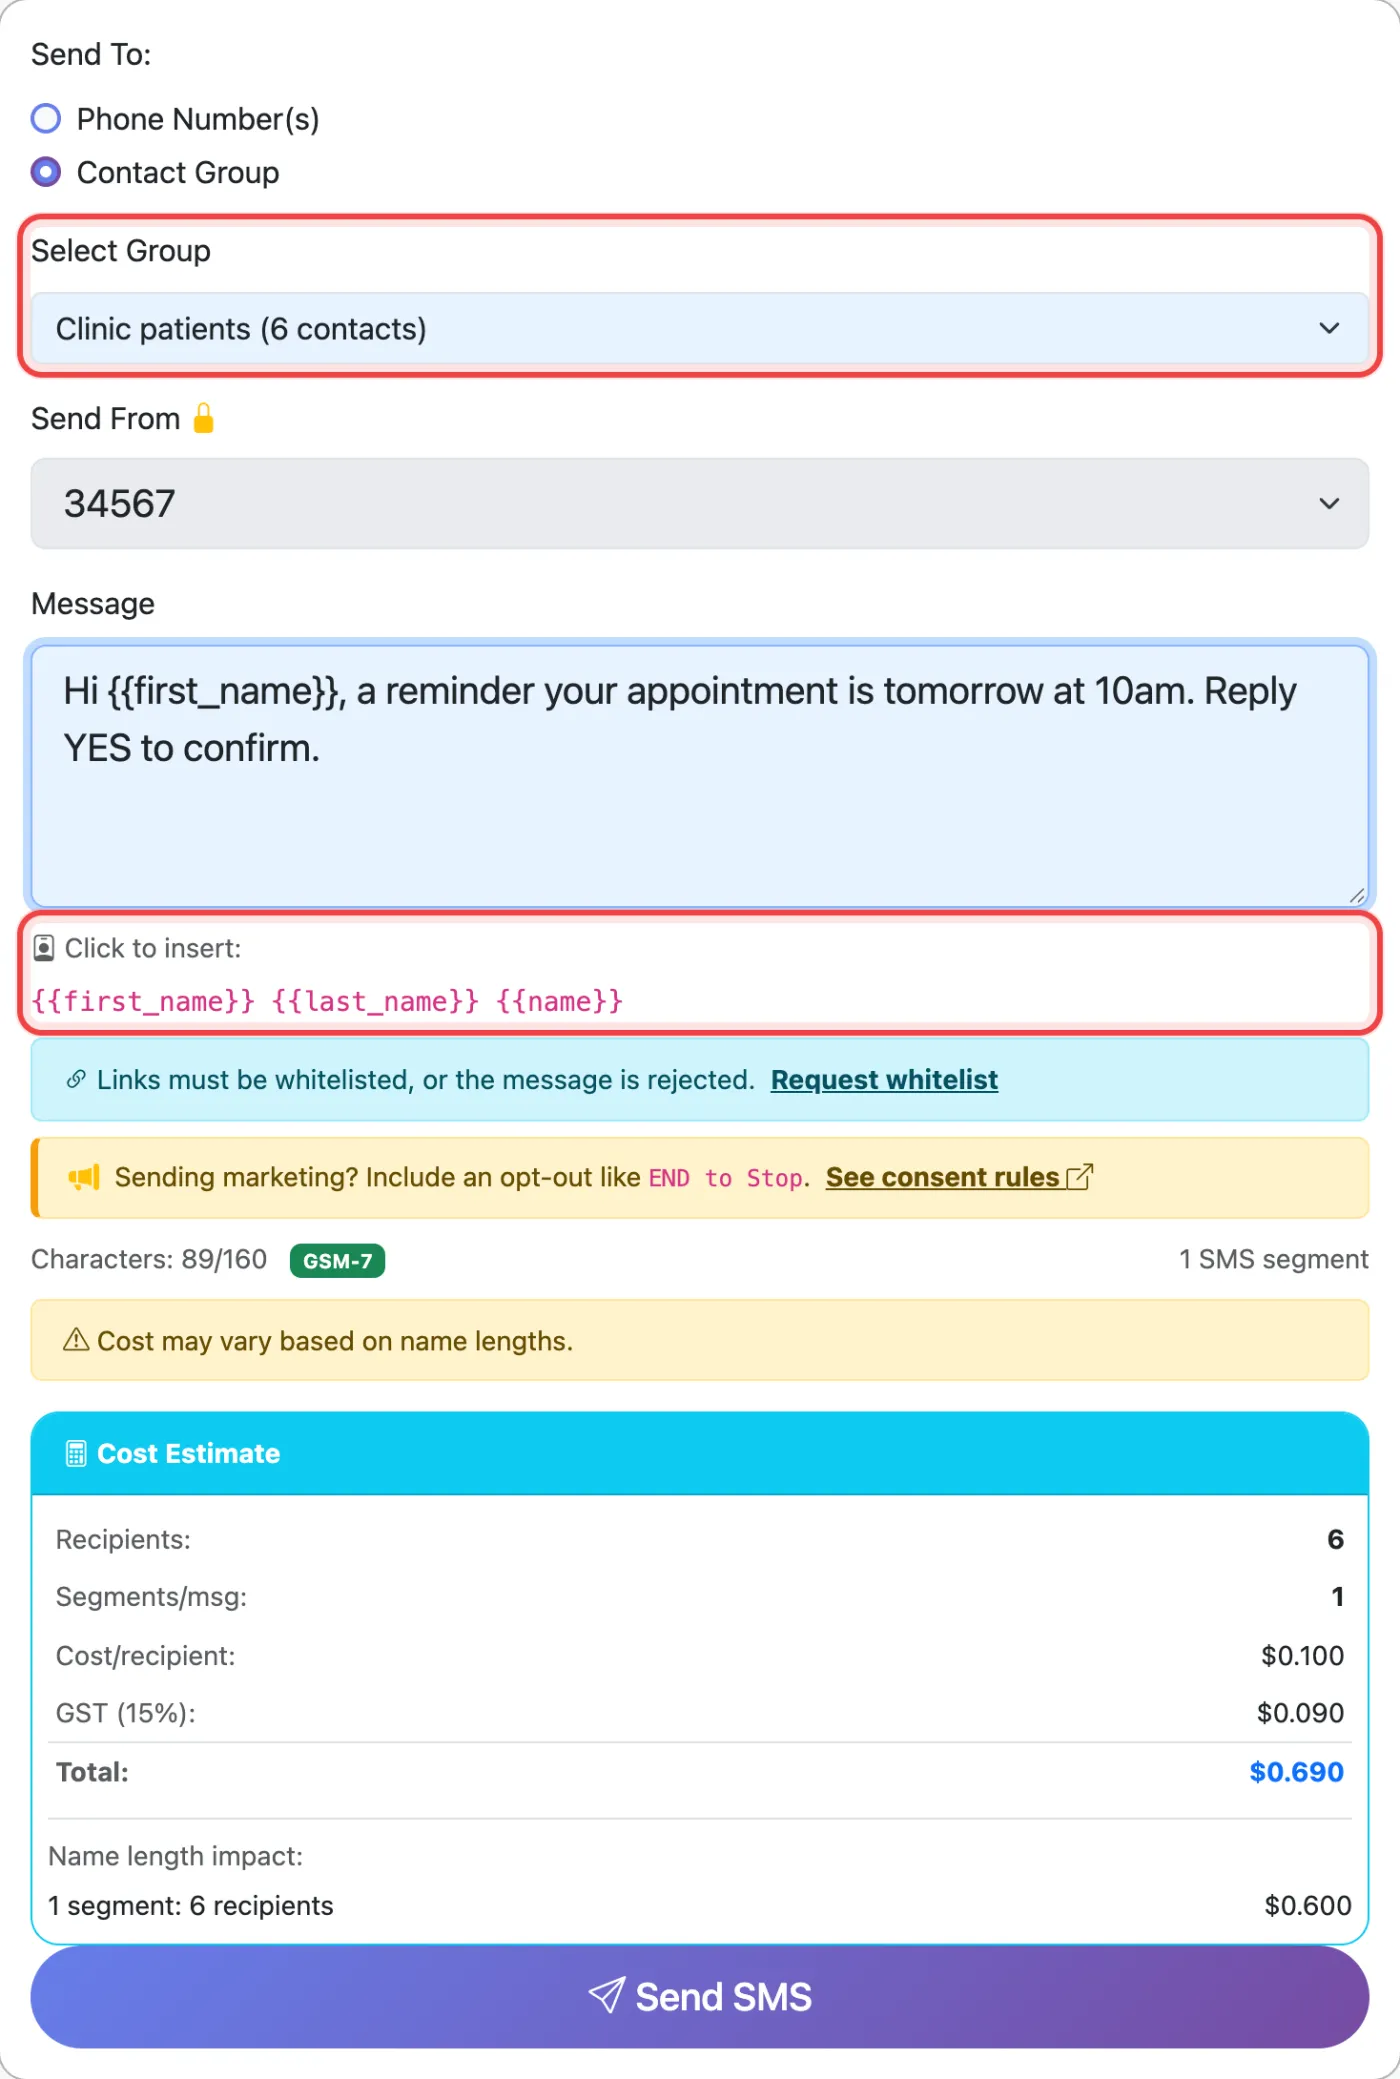
- Start a send. Click the green send icon on the group’s card. Or go to Send SMS, choose Contact Group and pick the group from Select Group.
- Write the message. To greet each person by name, click
{{first_name}}under Click to insert. - Check the cost. The Cost Estimate shows the number of recipients and the total including GST.
- Click Send SMS and confirm. Large groups are sent in batches, so leave the page open until it finishes.
Personalisation fields
| Field | Becomes | For “Sam Taylor” |
|---|---|---|
{{first_name}} | First word of the name | Sam |
{{last_name}} | Last word of the name (blank if only one word) | Taylor |
{{name}} | The full name | Sam Taylor |
Tip: Contacts without a name get a blank in place of the field. “Hi {{first_name}},” would become “Hi ,”. Add names to everyone, or write the message so it still reads well without one. Long names can push a message into a second SMS segment, which is why the cost estimate says Cost may vary based on name lengths.
Is my message marketing?
If the group message promotes something, such as a sale, an offer or an event you’re selling, it’s marketing. Different rules apply, including a free way to opt out. Read Transactional vs marketing SMS before you send.
Related articles
More in Contacts & Groups
We’re a small New Zealand team and happy to help.