Invite and manage team users (roles and permissions)
Invite staff, choose Member or Team admin, set permissions and budgets, and disable, reset 2FA or remove users.
Once Team Access is on, you add staff from the Users tab. Each person gets an email invitation, chooses their own password and logs in with their own email address. You choose their role, what they’re allowed to do, which groups they belong to, and an optional daily spend limit.
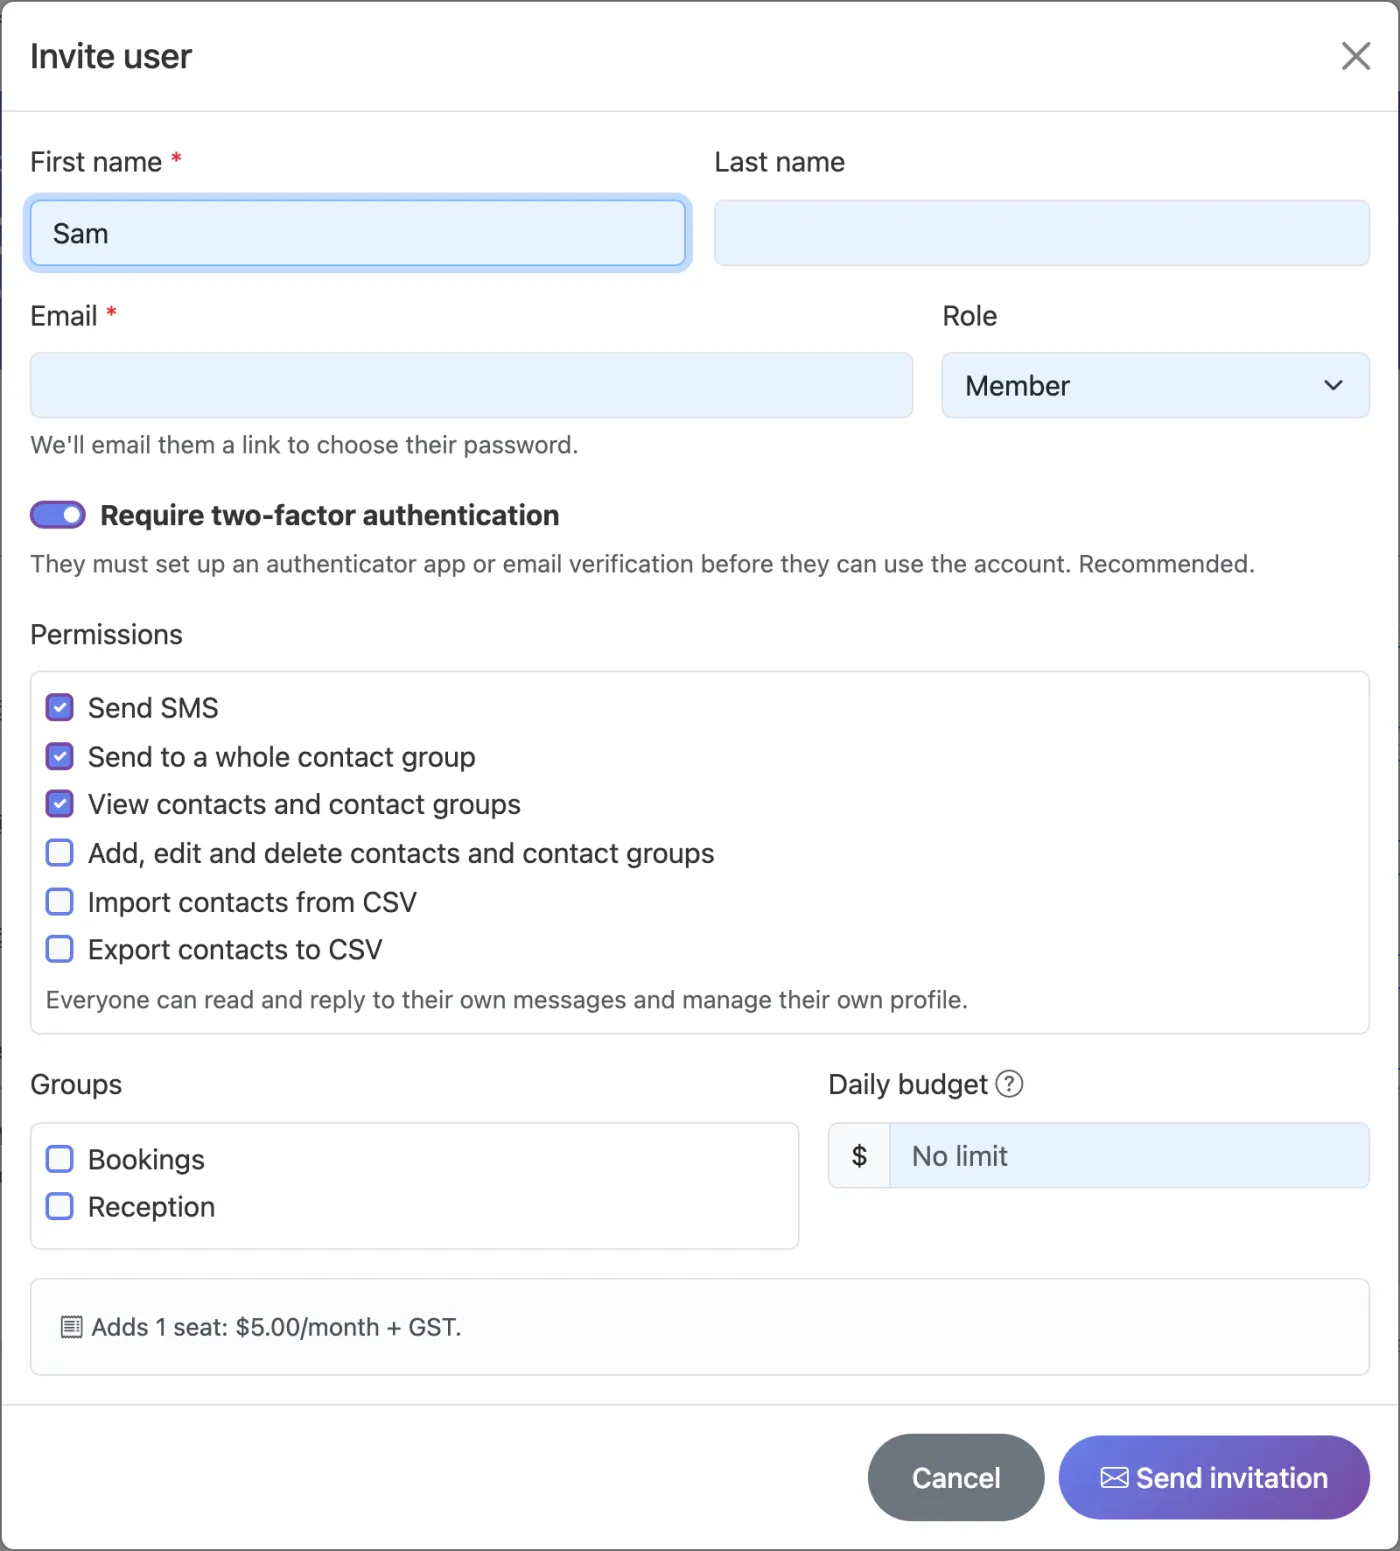
Invite a team user
- Open Team Access → Users and click Invite User.
- Enter their name and email. Each person needs their own email address; it can’t already be used for another WebSMS login.
- Choose a role: Member or Team admin (see below).
- Leave “Require two-factor authentication” on (recommended). They’ll set up an authenticator app or email login link before they can use the account.
- Tick their permissions and groups, and optionally set a Daily budget.
- Click Send invitation. They get an email with an Accept invitation button, valid for 7 days.
Roles: Member vs Team admin
| Member | Team admin | |
|---|---|---|
| Send SMS and reply | If permitted | Yes |
| Messages they can see | Their own, plus shared group inboxes | All messages on the account |
| Contacts | As permitted | Full access |
| Manage users, groups and team settings | No | Yes |
| Assign conversations to people or groups | No | Yes |
| API keys, integrations, billing, balance, keywords | Never | Never (owner only) |
Member permissions
| Permission | On by default |
|---|---|
| Send SMS | Yes |
| Send to a whole contact group | Yes |
| View contacts and contact groups | Yes |
| Add, edit and delete contacts and contact groups | No |
| Import contacts from CSV | No |
| Export contacts to CSV | No |
Everyone can read and reply to their own messages and manage their own profile. Untick Send SMS for someone who should only answer replies.
Managing users
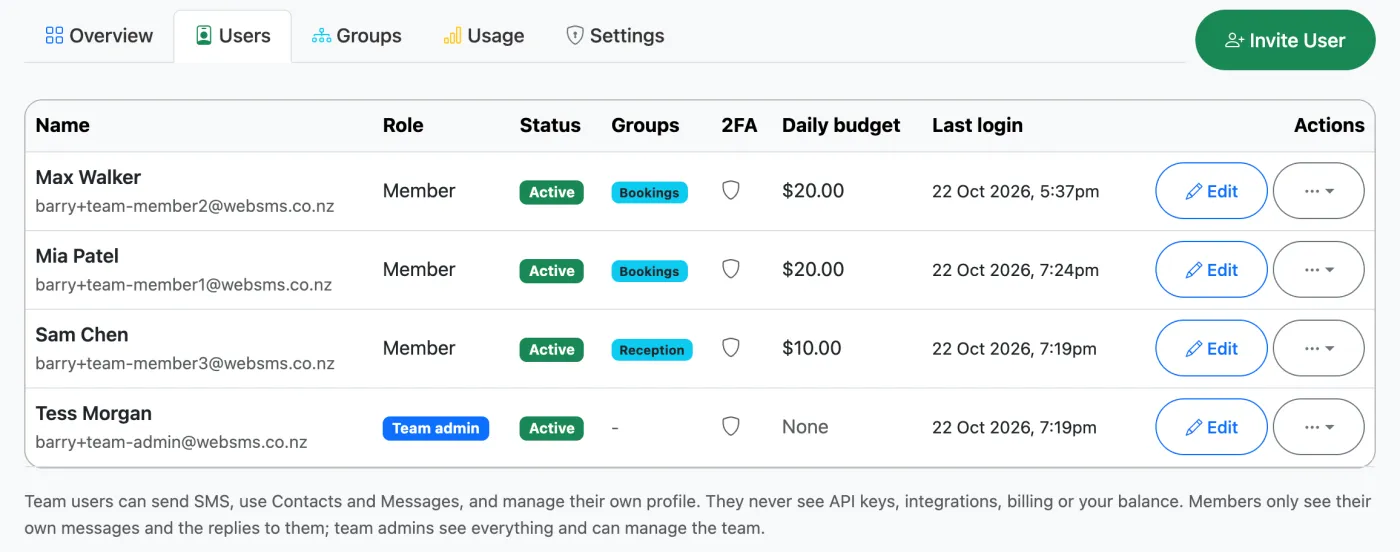
Click Edit to change someone’s name, role, permissions, groups or budget. The … menu has:
- Resend invite: sends a new link if they lost the email or it expired. Old links stop working.
- Sign out everywhere: signs them out on every device.
- Reset 2FA: use this if they lost their phone. They’re signed out and set up 2FA again at their next login.
- Disable: signs them out immediately and stops billing their seat. Their message history stays. Use Enable to restore them.
- Delete: removes the user permanently. Messages they sent stay in your history.
Staff member leaving? Disable them on their last day. It’s instant, stops their seat being billed and keeps their conversations for whoever takes over.
Related articles
More in Team Access
We’re a small New Zealand team and happy to help.